

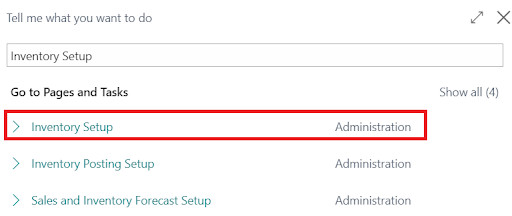
Before making use of inventory receipt and inventory shipment documents, you need to configure a few number series in the inventory setup. To do this use the tell-me tool to search for inventory setup.
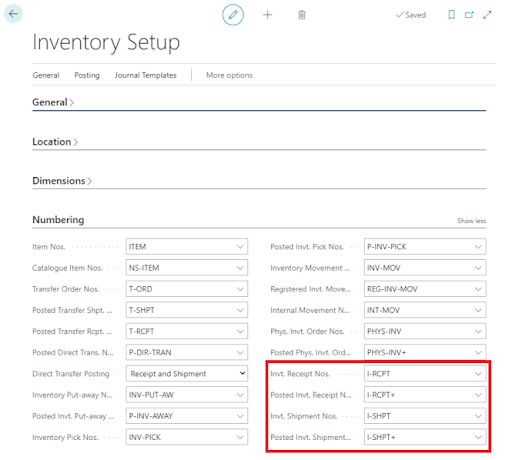
You then need to configure the following number series within the numbering fast tab:
Inventory Receipt Nos.: The number series configured in this field will be applied to unposted inventory receipt documents.
Posted Inventory Receipt Nos.: The number series configured in this field will be applied to posted inventory receipt documents.
Inventory Shipment Nos.: The number series configured in this field will be applied to unposted inventory shipment documents.
Posted Inventory Shipment Nos.: The number series configured in this field will be applied to posted inventory shipment documents.
To create an inventory receipt, use the tell-me tool to search for inventory receipts.
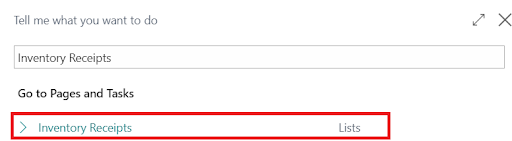
This will open the inventory receipt’s page which, when populated, will include a list of unposted inventory receipts. To create a new inventory receipt, click on new.

This will result in an empty inventory receipt card being opened – and you’ll need to populate the following as appropriate to successfully create an inventory receipt:
In the general fast tab:
No.: In this field you should specify a number for the associated inventory receipt. Typically, this will be based on the inventory receipts nos. field located in the inventory setup.
Posting Description: In this field you can enter any informative text that will be useful alongside the inventory receipt, such as text that will aid auditors when completing an internal audit.
Location Code: In this field you can specify the warehouse location where the items stated on the inventory receipt lines will be stored. The location entered here will be automatically populated on each inventory receipt line appended to this document.
General Business Posting Group: This is where you can assign the inventory receipt a general product posting group (which is created through the general business posting groups page and assigned to a setup on the general posting setup page). The posting group you specify here will determine which G/L accounts are used to when the inventory receipt is posted.
Posting Date: This is the date the system will action on the inventory receipt lines you are creating.
Document Date: This field should specify the date when the inventory receipt document was created and will be automatically populated when the no. field is populated.
External Document No.: When appropriate, this field should be used to specify a document number that refers to the relevant customer/vendor’s number system.
Salesperson/Purchaser Code: In this field you can associate a certain purchaser/salesperson with the inventory receipt by entering the appropriate purchaser/salesperson code.
Correction: If enabled, this field specifies that the inventory receipt was corrected in some way. It should be enabled if you want to post a correct entry to an amount on an inventory receipt line.
Status: This is a non-editable field that specifies whether the inventory receipt is open or released. To release an inventory receipt, click on release on the relevant inventory receipt card’s navigation menu.
On the inventory receipt lines:
Item No.: In this field you should select the item you want to receipt from a list of items based on the item cards you have created.
Variant (Personalise Tool): In this field you can specify a variant of the item entered in the item no. field. If you have created an item variant on the relevant item card, the variant will appear on the field’s dropdown menu. To make use of this field, it will need to be brought in by using the personalize tool.
Description: This field should contain a description of the item entered in the item no. field and will be automatically populated based on the associated item card.
Quantity: In this field you should state the number of units of the item entered in the item no. field that you are expecting to receive.
Bin Code (Personalise Tool): If necessary, this field can be used to specify the bin where the items are being put-away in. To make use of this field, it will need to be brought in by using the personalize tool.
Unit Amount: In this field, you can specify the price per unit for the item specified in the item no. field.
Indirect Cost %: If there are any indirect costs associated with the item being received, such as freight costs, then you can enter a percentage for those costs here – the percentage applied will depend on the unit amount you state.
Unit Cost: This field should state the cost of one unit of item specified in the item no. field.
Amount: This field should contain the transaction amount for the item specified in the item no. field.
Unit of Measure Code: This field should contain the default unit of measure entered on the associated item card and will be automatically populated when you select an item in the item no. field. If you have configured alternative unit of measures for the relevant item, you can select these by clicking on the field’s dropdown menu.
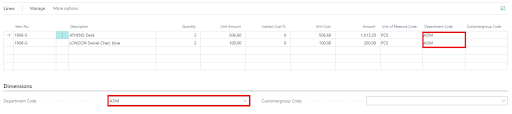
Global Dimensions 1 & 2: In the inventory receipt lines, two fields will be reserved for the global dimensions that have been configured in the general ledger setup and can be used to assign the appropriate dimension values to each line.
In the dimensions fast tab, you are able to specify specific dimension values to be applied to all the items featured in the inventory receipt lines.
When an inventory receipt is posted the following entries will be made:
- An inventory receipt header entry.
- G/L entries.
- Item ledger entries.
- Value entries.
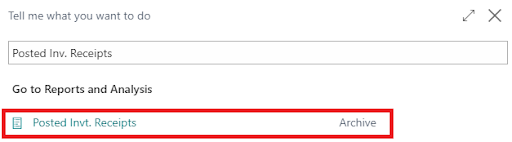
To view these entries, you’ll need to access the posted inventory shipments page. To do this, use the tell-me tool to search for posted inventory receipts.
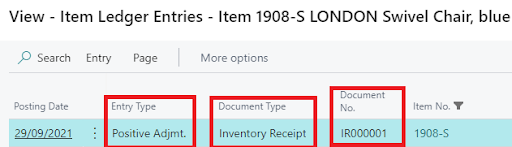
You can also head to the item cards of the items involved in the inventory receipt and drill down on the relevant item card’s inventory field.

This will take you to the item’s historical ledger entries and, assuming you have posted the inventory receipt, there will be a positive inventory adjustment – with the document type field being ‘inventory receipt’ and document no. field containing the document number of the posted inventory receipt.
To create an inventory shipment, use the tell-me tool to search for inventory shipments.
By doing this, you’ll open the inventory receipts page which, when populated, will contain a list of unposted inventory shipments. To create a new inventory shipment, click on new.
This will launch an empty inventory shipment card – and you’ll need to populate the following as appropriate:
In the general fast tab:
No.: In this field you should specify a number for the associated inventory shipment. Typically, this will be based on the inventory shipments nos. field located in the inventory setup.
Posting Description: In this field you can enter any informative text that will be useful to alongside the inventory receipt, such as text that will aid auditors when completing an internal audit.
Location Code: In this field you can specify the warehouse location where the items stated on the inventory shipment lines will be stored. The location entered here will be automatically populated on each inventory shipment line appended to this document.
General Business Posting Group: This is where you can assign the inventory shipment a general product posting group (which is created through the general business posting groups page and assigned to a setup on the general posting setup page). The posting group you specify here will determine which G/L accounts are used to when the inventory shipment is posted.
Posting Date: This is the date the system will action on the inventory receipt lines you are creating.
Document Date: This field should specify the date when the inventory shipment document was created and will be automatically populated when the no. field is populated.
External Document No.: When appropriate, this field should be used to specify a document number that refers to the relevant customer/vendor’s number system.
Salesperson/Purchaser Code: In this field you can associate a certain purchaser/salesperson with the inventory receipt by entering the appropriate purchaser/salesperson code.
Correction: If enabled, this field specifies that the inventory shipment was corrected in some way. It should be enabled if you want to post a correct entry to an amount on an inventory shipment line.
Status: This is a non-editable field that specifies whether the inventory shipment is open or released. To release an inventory shipment, click on release on the relevant inventory shipment card’s navigation menu.
On the inventory shipment lines:
Item No.: In this field you should select the item you want to receipt from a list of items based on the item cards you have created.
Variant (Personalise Tool): In this field you can specify a variant of the item entered in the item no. field. If you have created an item variant on the relevant item card, the variant will appear on the field’s dropdown menu. To make use of this field, it will need to be brought in by using the personalize tool.
Description: This field should contain a description of the item entered in the item no. field and will be automatically populated based on the associated item card.
Quantity: In this field you should state the number of units of the item entered in the item no. field that you are expecting to receive.
Reason Code: In this field can specify a reason for the shipment you’re planning to make on the given inventory shipment line. For historical purposes, this field can be very useful and provides reasoning for why the inventory shipment line was created.
Unit Cost: This field should state the cost of one unit of item specified in the item no. field. If a unit cost has been entered on the corresponding item card, it will be automatically populated in this field.
Unit Amount: In this field you should specify the price per unit for the item If a unit amount has been entered on the corresponding item card, it will be automatically populated in this field.
Amount: This field should specify the transaction amount for the item specified in the item no. field.
Unit of Measure Code: This field should contain the default unit of measure entered on the associated item card and will be automatically populated when you select an item in the item no. field. If you have configured alternative unit of measures for the relevant item, you can select these by clicking on the field’s dropdown menu.
Global Dimensions 1 & 2: In the inventory receipt lines two fields will be reserved for the global dimensions that have been configured in the general ledger setup and can be used to assign the appropriate dimension values to each line.
In the dimensions fast tab, you are able to specify specific dimension values to be applied to all the items featured in the inventory shipment lines.

When an inventory shipment is posted the following entries will be made:
- An inventory shipment header entry.
- G/L entries.
- Item ledger entries.
- Value entries.
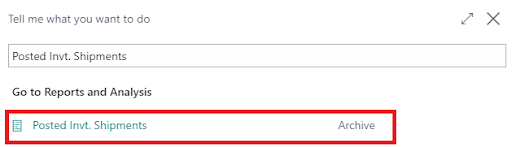
To view these entries, you’ll need to access the posted inventory shipments page. To do this, use the tell-me tool to search for posted inventory shipments.
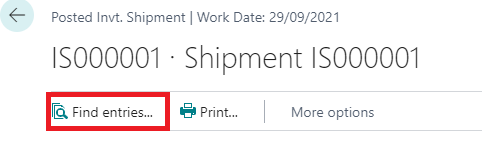
This will result in a list of posted inventory shipments being shown. You will then need to select the appropriate inventory shipment and click on find entries from the given posted inventory shipment card.
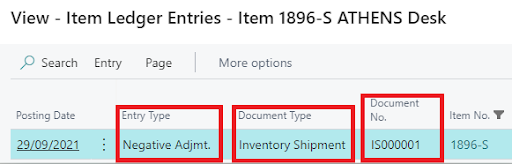
You can also head to the item cards of the items involved in the inventory shipment and drill down on the relevant item card’s inventory field.
This will take you to the item’s historical ledger entries and, assuming you have posted the inventory shipment there, will be a positive inventory adjustment – with the document type field being ‘inventory receipt’ and document no. field containing the document number of the posted inventory shipment.
Interested in learning more? Contact the team here at Sci-Net and find out how we can help you make the most of the features in Microsoft Dynamic 365 Business Central platform 01869 717425 or email [email protected]